This guide is for homeowners who are deciding between Luxury Vinyl Plank and ceramic or porcelain tile for a kitchen or bathroom. It walks you through the most relevant factors—moisture performance, installation effort, upkeep, and overall value—so you can pick the floor that matches your space, budget, and skill level.
Follow the step‑by‑step framework to compare water‑resistance ratings, underlayment needs, wear‑layer thickness, grout considerations, and long‑term repair options. By the end you’ll have a clear picture of which material delivers the durability and look you want without unnecessary surprise costs.
Understanding Vinyl and Tile Fundamentals
Vinyl flooring comes in two main formats: Luxury Vinyl Plank (LVP) and sheet vinyl. LVP mimics wood or stone with a printed wear layer that sits on top of a dense core, often composed of PVC or a composite wood‑plastic blend. Sheet vinyl is a continuous roll that may be embossed for texture and typically includes a printed design layer, a wear layer, and a backing. Both types are flexible, allowing them to conform to minor subfloor irregularities, but they rely on a smooth, level base to prevent telegraphing of imperfections.
Ceramic and porcelain tiles share a glazed surface but differ in body composition. Ceramic tile is made from a porous clay body fired at lower temperatures, while porcelain tile uses a denser, less porous porcelain clay fired at higher temperatures. The result is a harder, more water‑tight tile that can be thinner yet still strong.
Each product consists of distinct layers. LVP typically measures 2 – 6 mm total thickness, with a wear layer of 0.2 – 0.6 mm protecting the printed design, followed by a backing layer that adds stability. Sheet vinyl is usually 1 – 3 mm thick, with a wear layer and a reinforcing backing. Ceramic tile thickness ranges from 6 – 12 mm, and porcelain can be as thin as 4 mm while maintaining strength. Both tile types have a glazed surface, a body layer, and often a moisture‑resistant rating (WRR) printed on the back.
When installed, vinyl rests directly on an underlayment or a prepared subfloor, relying on adhesive or click‑lock systems to stay in place. Tile requires a cementitious mortar bed that bonds to the subfloor, and grout fills the joints to seal against moisture. Proper subfloor preparation—clean, flat, and structurally sound—is essential for both materials to achieve their intended performance and longevity.
Moisture Resistance and Suitability for Wet Areas
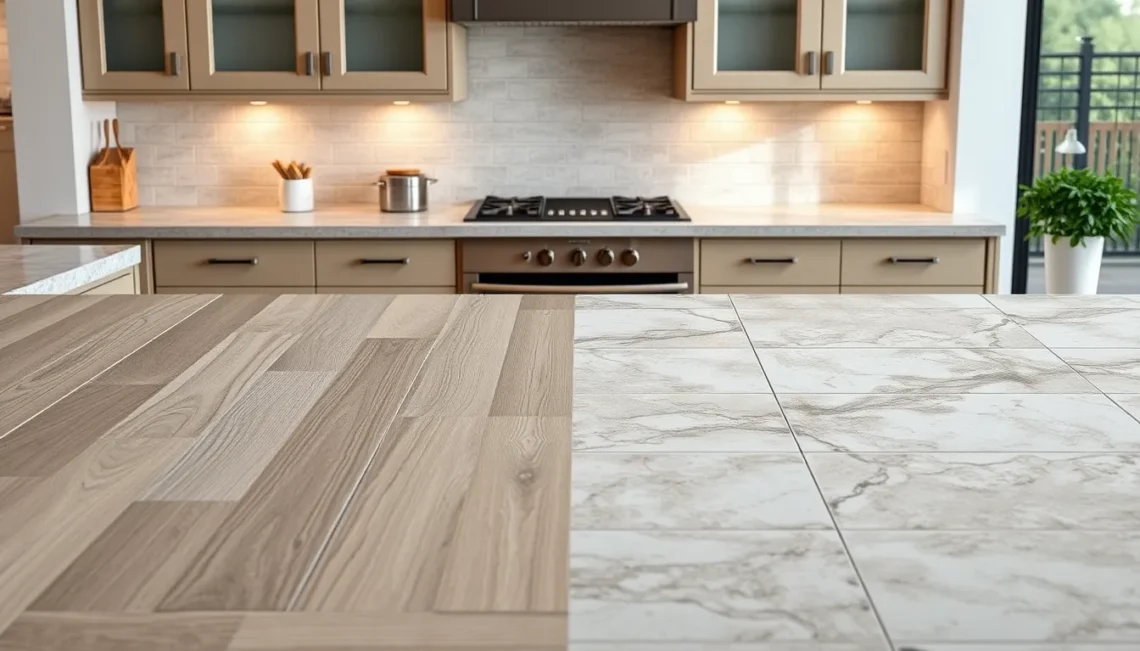
Vinyl vs. Tile Flooring for Kitchens and Bathrooms hinges on how each product handles water. LVP is manufactured with a high Water Resistance Rating (WRR) that prevents moisture from penetrating the core, while ceramic and porcelain tile are essentially impermeable, with porcelain offering the lowest absorption rate of the two.
In a bathroom, the floor is constantly exposed to steam and direct water contact, so a WRR that meets or exceeds the demands of a wet environment is essential. Porcelain tile’s dense body and glazed surface make it the safest choice for shower surrounds, whereas LVP can perform well when the WRR is rated for “wet‑room” applications and seams are sealed with a compatible tape or sealant.
Kitchens benefit from spill resistance rather than prolonged immersion. LVP’s wear layer adds a protective barrier that repels minor splashes, and a properly installed moisture‑blocking underlayment further reduces the chance of water reaching the subfloor. Tile, while water‑tight, requires careful grout maintenance; any cracked or missing grout can become a hidden leak path.
Practical tips:
- Choose LVP with a WRR specifically labeled for bathrooms if the space includes a tub or shower.
- When installing tile, use a high‑quality, polymer‑modified thinset and apply grout that is rated for low absorption.
- Apply a water‑resistant underlayment beneath LVP in both kitchens and bathrooms, and seal all LVP seams with a manufacturer‑approved seam sealer.
- Periodically inspect grout lines and sealant joints; re‑seal any areas that show signs of wear.
Installation Methods and DIY Viability
For Luxury Vinyl Plank (LVP), the two most common DIY routes are click‑lock and glue‑down. Click‑lock boards snap together over a smooth, clean subfloor with a thin underlayment; the process requires a utility knife, tapping block, and a pull‑bar. After the floor is laid, a rolling pin or weighted roller helps seal the seams. Glue‑down LVP uses a pressure‑sensitive adhesive applied with a trowel; this method is slightly more time‑consuming but offers a firmer bond on uneven subfloors.
Ceramic and porcelain tile installations rely on a thin‑set mortar bed. A notched trowel spreads the mortar, and tiles are pressed into place, leaving consistent spacing for grout. Once the mortar cures, grout is mixed and applied with a rubber float, then wiped clean. A grout sealer is often used in wet rooms to protect against moisture penetration.
- Tools needed for LVP: utility knife, spacers (optional), tapping block, pull‑bar, roller.
- Tools needed for tile: notched trowel, mixing bucket, rubber float, grout sponge, level, tile cutter or wet saw.
- Prep steps common to both: remove existing flooring, repair any subfloor defects, ensure the surface is level, and lay a moisture‑resistant underlayment where required.
The learning curve for click‑lock LVP is low; most homeowners can complete a room in a weekend with careful measurement. Glue‑down LVP adds a step of adhesive handling, which some find tricky but still manageable. Tile work demands more skill: accurate layout, consistent mortar thickness, and precise grout application. Mistakes can lead to uneven surfaces, cracked tiles, or water‑infiltration.
Professional assistance is advisable when:
- The subfloor is uneven or damaged beyond simple patching.
- Complex patterns, diagonal layouts, or large format tiles are desired.
- High‑traffic bathrooms require a flawless, long‑lasting tile installation.
- Local building codes mandate a certified installer for certain wet‑area applications.
Durability, Maintenance, and Repair Strategies
Durability hinges on the core construction of each product. LVP relies on a thick wear layer and a high Water Resistance Rating (WRR); a well‑capped wear layer resists scratches from furniture legs and most household stains, but deep dents from heavy objects may still compress the surface. Ceramic and porcelain tiles are inherently hard; porcelain’s denser body makes it less prone to chipping, while glazed ceramic can show surface scratches if abrasive cleaners are used.
Grout is the weak link in tiled installations. Even well‑mixed grout can absorb moisture and develop stains over time. Sealing grout annually helps repel water and reduces discoloration. In high‑traffic bathrooms, inspect grout lines weekly; replace cracked sections promptly to prevent water infiltration that could affect the subfloor.
Routine cleaning
- LVP: Sweep or vacuum with a soft brush, then mop with a neutral‑pH cleaner. Avoid steam mops, which can lift seams.
- Ceramic/Porcelain Tile: Use a pH‑balanced tile cleaner; a soft mop or microfiber cloth prevents scratching the glaze.
- Grout: Apply a grout‑safe cleaner and a soft brush; rinse thoroughly.
Simple repair strategies
- LVP dents: Apply gentle heat (a hair dryer) to the dented area, then press a heavy, flat object to restore shape. For deeper gouges, a matching repair kit can fill the void.
- Tile cracks: Small cracks can be filled with epoxy designed for ceramic or porcelain. Larger breaks usually require removing the affected tile, cleaning the substrate, and reinstalling a new tile with fresh thin‑set mortar.
- Grout cracks: Scrape out the damaged grout, clean the joint, and re‑apply new grout, sealing it once cured.
Cost Considerations and Long‑Term Value
When weighing Vinyl vs. Tile Flooring for Kitchens and Bathrooms, the first line item is the material price per square foot. Luxury Vinyl Plank (LVP) typically falls below the cost range of most ceramic and porcelain tiles, while premium porcelain can approach the higher end of the tile market. The price gap widens when you factor in the required underlayment for LVP versus the thin‑set mortar and grout needed for tile.
| Expense | LVP | Ceramic/Porcelain Tile |
|---|---|---|
| Material (per sq ft) | Lower | Higher |
| Installation labor | DIY‑friendly, shorter time | Professional install, longer labor |
| Underlayment / Thin‑set | Underlayment required | Thin‑set mortar required |
| Grout / Sealant | Not needed | Grout plus sealant for porous tiles |
Labor costs reflect the skill level: LVP can be floated over a prepared subfloor in a day, while tile installation often demands multiple days for setting, grouting, and curing. Ancillary items such as premium underlayment with a high Water Resistance Rating (WRR) or a thick wear layer add modest expense to LVP but are essential for long‑term performance.
Life expectancy influences total cost of ownership. A well‑installed LVP floor generally serves 10–20 years before replacement is advisable, whereas ceramic or porcelain tile can last 30 years or more with minimal upkeep. Ongoing maintenance—periodic resealing for tile versus occasional cleaning for LVP—also shifts the long‑term budget.
From a resale perspective, tile often commands a premium in upscale markets because of its perceived durability and design versatility. Modern LVP, however, has narrowed that gap, especially when paired with a high‑WRR product that mimics the look of natural stone. Ultimately, the balance of upfront outlay, anticipated lifespan, and the buyer’s expectations determines which side of the Vinyl vs. Tile Flooring for Kitchens and Bathrooms equation offers the best value.